Seeing 100% Disk Usage in Task Manager is one of the most frustrating Windows issues. Your PC becomes extremely slow, apps freeze or take forever to open, and even simple tasks feel laggy. This problem affects both Windows 10 and Windows 11 users and can be caused by background services, outdated drivers, corrupted files, or even recent Windows security updates.
The good news? In most cases, you can fix it permanently without reinstalling Windows. Follow these proven steps in order. Many users see immediate improvement after the first or second fix.
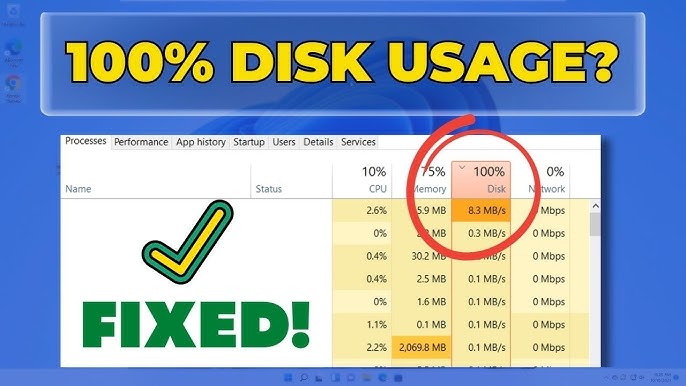
Step 1: Identify the Culprit Using Task Manager
Before fixing anything, find out what’s causing the high disk usage.
- Press Ctrl + Shift + Esc to open Task Manager.
- Go to the Processes tab.
- Click the Disk column header to sort by highest usage.
- Note any process using a high percentage (e.g., System, Antimalware Service Executable, Windows Search, or SysMain).
If a specific app or service stands out, close it temporarily to test. If nothing obvious appears, proceed to the fixes below.
Step 2: Restart Your PC (Quick First Check)
A simple restart often clears temporary glitches, especially after Windows updates. Restart (don’t just shut down) and check Task Manager again.
Step 3: Disable SysMain (Superfetch) – Most Common Fix
SysMain (formerly Superfetch) preloads apps into memory but frequently causes 100% disk usage on modern systems.
- Press Win + R, type services.msc, and press Enter.
- Find SysMain (or Superfetch) in the list.
- Right-click it → Properties.
- Set Startup type to Disabled.
- Click Stop if the service is running.
- Click Apply → OK.
Restart your PC. This fix resolves the issue for a large number of users.
Step 4: Disable Windows Search Indexing
Windows Search constantly indexes files and can overload your disk, especially on HDDs or large drives.
- Open services.msc again.
- Find Windows Search.
- Right-click → Properties.
- Set Startup type to Disabled and click Stop.
- Apply changes and restart.
Alternatively, you can reduce indexing instead of fully disabling it by going to Indexing Options in the Start menu and removing unnecessary folders.
Step 5: Update Storage Drivers and Windows
Outdated or buggy drivers (especially for SSDs/NVMe) and certain Windows security updates are known to trigger high disk usage.
- Open Settings → Windows Update → Check for updates and install all available ones.
- Go to Device Manager (right-click Start button), expand Disk drives and Storage controllers.
- Right-click your drive → Update driver → Search automatically.
- Also update chipset drivers from your motherboard/CPU manufacturer (AMD or Intel).
Step 6: Run Disk Check (chkdsk)
Corrupted files or bad sectors can force the disk to work overtime.
- Open Command Prompt as Administrator (search for cmd → Run as administrator).
- Type the following command and press Enter: chkdsk C: /f /r (Replace C: with your system drive if different.)
- Type Y and restart when prompted. The scan may take 30–60 minutes or longer.
Step 7: Reset Virtual Memory (Pagefile)
Virtual memory issues frequently contribute to 100% disk spikes.
- Right-click This PC → Properties → Advanced system settings.
- Under Performance, click Settings → Advanced tab → Change (under Virtual memory).
- Uncheck Automatically manage paging file size for all drives.
- Select your system drive → Choose Custom size or No paging file temporarily, then click Set.
- Restart, then re-enable automatic management or set a reasonable size (1.5x your RAM is a good starting point).
- Restart again.
Step 8: Additional Effective Fixes
- Disable Startup Apps: In Task Manager → Startup apps tab, disable unnecessary programs.
- Scan for Malware: Run a full scan with Windows Defender or a trusted tool.
- Turn Off Scheduled Disk Optimization: Search for “Defragment and Optimize Drives” → Change settings → Uncheck “Run on a schedule”.
- Clean Boot: Search for msconfig → Services tab → Hide all Microsoft services → Disable the rest → Restart and test.
- Reset Windows Update Components (if updates seem to trigger the issue): Use admin Command Prompt commands to stop and restart update services.
Quick Comparison of Common Causes & Fixes
| Cause | Likely Trigger | Best Fix | Expected Improvement |
|---|---|---|---|
| SysMain (Superfetch) | Background preloading | Disable in Services | Immediate |
| Windows Search Indexing | Constant file scanning | Disable in Services | High |
| Outdated Drivers | Storage/Chipset drivers | Update via Device Manager | High |
| Corrupted Files/Bad Sectors | Disk errors | chkdsk /f /r | Medium-High |
| Virtual Memory Issues | Low RAM or paging file problems | Reset Virtual Memory | Medium |
| Recent Windows Updates | Security/KB updates | Install latest fixes or clean boot | Variable |
When to Consider Advanced Steps
If none of the above works:
- Perform a Clean Install of Windows 11/10 (back up data first).
- Test your drive health using CrystalDiskInfo or manufacturer tools (e.g., Samsung Magician, Intel SSD Toolbox).
- Check for overheating or failing hardware (especially older HDDs).
Prevention Tips for 2026
- Keep Windows and drivers updated regularly.
- Use an SSD instead of HDD whenever possible.
- Avoid installing too many startup programs.
- Monitor Task Manager regularly after major updates.
After applying these fixes, your disk usage should drop to normal levels (usually under 10–20% at idle). Start with disabling SysMain and Windows Search — they solve the problem for most people.
If the issue returns after a Windows update, note the KB number and check Microsoft forums for known issues. Feel free to share your Task Manager screenshot or specific symptoms for more targeted help.
Your PC should now run smoothly again!